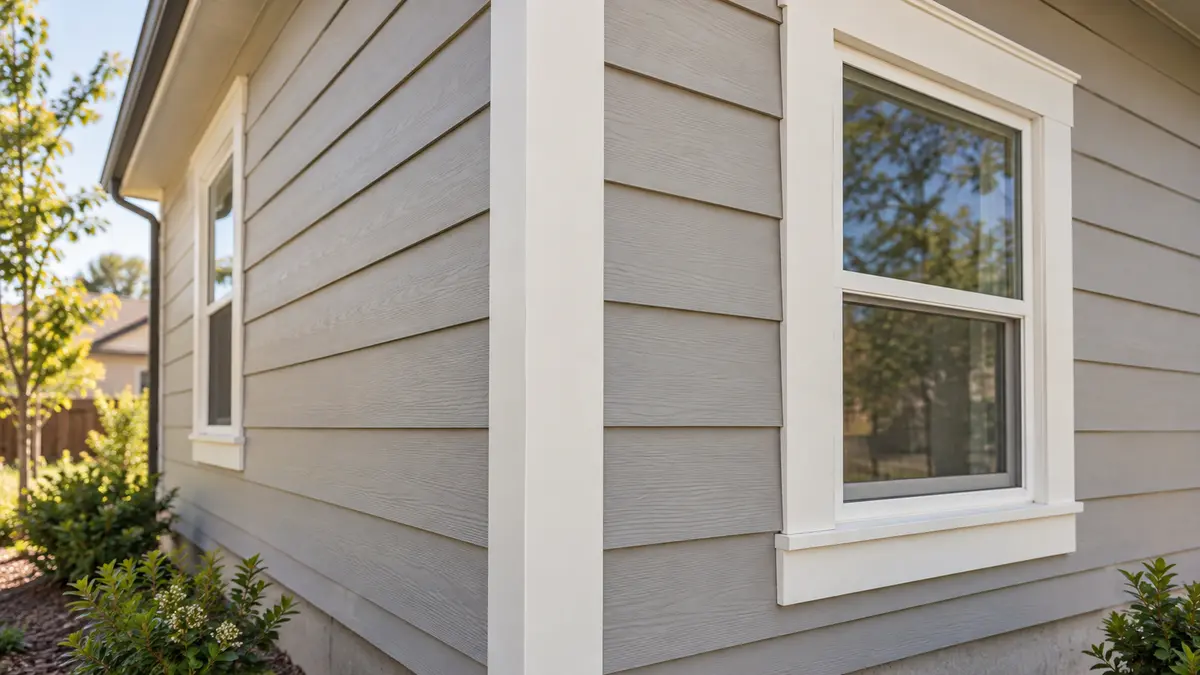
Siding trim lasts when it is selected and installed as part of the complete wall assembly. Before approving a Sacramento siding proposal, ask for drawings or product details showing how the siding terminates at outside and inside corners, windows, doors, horizontal bands, roof intersections and penetrations. The answer should identify the exact trim product, backing, flashing, clearances, fastening and sealant joints—not simply say “standard trim included.”
There is no universal corner detail for fiber cement, engineered wood and vinyl. Each system manages movement and water differently, so the current instructions for the selected product must control the installation.
Why trim details matter beyond appearance
Trim creates the finished edge around places where the siding field stops or changes direction. Those locations concentrate cuts, fasteners, material transitions and openings in the water-resistive barrier (WRB). A crisp paint line can still conceal a weak detail if water has no drainage path, cut edges are untreated, or the joint cannot accommodate the movement expected by the manufacturer.
Think of trim as serving four connected jobs:
- Provide an intentional termination for the cladding
- Support the required gap, overlap or accessory profile
- Coordinate flashing and drainage at openings and transitions
- Produce consistent reveals and shadow lines across the elevation
The cladding, trim and WRB should work together. Trim and caulk alone are not the primary rain-control layer behind the siding.
Start with the exact siding system
A useful proposal names the manufacturer, product line, profile, exposure and trim or accessory system. “Fiber cement with white trim” does not tell the installer which corner method, joint spacing, fastener or cut-edge treatment to use.
For example, an engineered-wood system may permit lap siding to butt into trim with a specified sealant joint, while a vinyl installation normally uses formed corner posts and slotted fastening that allows the panels and accessories to move. PEPA's installation manual also calls for water-resistive flashing at inside and outside corners before vinyl corner posts are installed. These are different assemblies even when they produce a similar finished outline.
Ask the estimator to attach or identify the current installation instructions for every proposed cladding and trim product. If products from different systems are combined, request written confirmation that the transition is supported by both manufacturers or by a project-specific approved detail.
Outside corners: ask what is behind the finished edge
An outside corner may use thick trim boards, a formed corner post, a metal corner cover or another listed accessory. The proposal should show:
- The trim material and actual width and thickness
- Whether siding butts to the trim or runs behind an approved overlay detail
- The WRB or corner-flashing continuity behind the finish
- The required siding-to-trim joint and its treatment
- Fastener type, spacing and corrosion compatibility
- How lower ends terminate above roofs, decks, concrete or landscaping
- How the top connects to the soffit, frieze or other upper finish
Do not evaluate the corner only from the front. A durable detail also needs sound substrate and a continuous drainage path around the turn. If removal reveals soft sheathing, the repair should be documented and approved before new trim covers it.
Inside corners need drainage and maintenance access
Inside corners can collect debris and concentrate water from roof runoff, sprinklers or cleaning. They also make a narrow sealant joint difficult to prepare and repaint.
Ask whether the selected system uses a dedicated inside-corner profile, paired trim boards, J-channels or another approved detail. Confirm that the crew can install the siding without forcing short pieces into place and that the bottom of the corner does not trap water against horizontal trim or paving.
If a downspout, hose bib or irrigation head is close to the corner, address it in the scope. Our Sacramento siding and sprinkler checklist explains why repeated wetting and restricted clearance should be corrected rather than hidden behind new material.
Window and door trim must connect to flashing
Wide casing can improve proportion and cover an irregular edge, but width does not make the opening watertight. The trim plan should identify the head, jamb and sill conditions separately.
At the head, ask how flashing extends over the opening and directs water outward. At the jambs, verify the specified siding termination and sealant joint. At the sill, preserve window weeps and any designed drainage path; do not bridge them with trim or sealant.
Also resolve the trim depth before ordering material. New cladding, furring or a rainscreen can change the finished wall plane. A shallow retained casing may become recessed, while a thick build-out can interfere with screens, shutters or hardware.
Use the guide to replacing siding around existing windows to document the opening, WRB and future window plan before demolition.
Horizontal trim and material transitions require an exit for water
Band boards, belly bands, skirt boards and transitions between horizontal and vertical siding can create a shelf. A decorative horizontal line should not become a water reservoir.
The detail should show how water reaching the drainage plane exits above or over the transition. Ask about flashing, required clearance, cap or slope, joint treatment and the finish on exposed cut edges. The installer should not improvise by filling every visible gap with sealant when the product detail requires drainage or ventilation.
Where trim meets a roof, gutter or deck, preserve product-specific clearances and kick-out flashing. LP SmartSide's current lap-siding instructions, for example, direct installers not to run siding or trim inside the kick-out flashing or gutter. Exact dimensions and sequences vary, so apply the instructions for the chosen system and actual intersection.
For a closer look at the full junction, use the Sacramento roof-and-eave siding transition guide to coordinate step flashing, kick-out flashing, the wall drainage plane, soffit, fascia and gutter responsibility before the wall is closed.
Cut edges, end joints and sealant are separate decisions
Three details are often grouped together even though they solve different problems:
- Cut-edge treatment protects an exposed edge as required by the product instructions.
- Joint design provides the specified gap, overlap, flashing or accessory.
- Sealant closes only the joints identified for sealant and must remain compatible with the adjacent finishes.
Ask who treats field cuts, which coating or method is approved, and how touch-up will be documented. Then ask which joints receive sealant, what backing or joint geometry is required, and which joints must remain open to drain.
Avoid a proposal that treats a large bead of caulk as a substitute for flashing. Sealant ages and needs inspection; concealed shingle-lapped flashing and WRB integration provide the path that manages water when the exposed joint is stressed.
Seven photos to require before trim conceals the work
Photo documentation makes a final walk-through more useful. Request wide and close views of:
- The exposed corner sheathing and WRB condition
- Corner flashing or WRB continuity before trim
- Window and door head flashing before casing
- Horizontal transition flashing before the next layer
- Treated field-cut edges where they will be concealed
- Fastener and joint details for each trim type
- The finished corner from both elevations
Label photos by wall or opening. A folder full of unidentified close-ups is difficult to use later.
Put every trim location in the siding proposal
The trim schedule should identify outside corners, inside corners, window and door casing, frieze, fascia and soffit scope, horizontal bands, mounting blocks, penetrations and transitions to other materials. It should also state whether existing trim is reused, wrapped or replaced and who is responsible for primer, finish coats and future touch-up material.
Our Sacramento siding estimate guide shows how trim fits with demolition, sheathing, WRB, finish and concealed-condition allowances. Add a simple elevation sketch so bidders price the same corner widths, opening details and accent locations.
Questions homeowners often ask
Is caulk required where siding meets corner trim?
It depends on the exact siding and trim system. Some assemblies specify a sealant joint; others rely on a formed accessory, overlap or flashing detail. Follow the current manufacturer instructions rather than applying one rule to every material.
Can old corner boards stay during siding replacement?
Sometimes, if they are sound, correctly sized for the new wall plane and compatible with the selected installation. The contractor still needs access to inspect the substrate and connect the new drainage layers. The proposal should explain how retained trim will be evaluated and what happens if concealed damage is found.
Should every trim joint be sealed?
No. Some openings and accessories need drainage or movement. Sealing a designed outlet can trap water. The installation documents should identify sealed joints and joints that remain open.
Do trim dimensions affect the appearance?
Yes. Corner width, casing width, reveal, depth and alignment with horizontal bands change the proportions of the whole elevation. Approve a marked elevation or sample corner before installation begins.
Review the trim plan before material is ordered
Yellowstone Renovation can incorporate a location-by-location trim schedule into a Sacramento siding replacement proposal. Review the Sacramento service-area page and the company's completed exterior Project Showcase, then request an on-site siding estimate. The image on this article is editorial, not a photograph of a Yellowstone Renovation customer project.